Wednesday 14 July 2021

Time passing

The film spans over a period of about a year, however seeing that its only a 2 minute film I struggled with making the time passing.

My first idea was to introduce a quick timelapse like a compressed version of the sequence in Up.

After testing different version of the cleaning sequence.

Dein na muu: a guide to how I created it. 💅

This is documentation on how the production of my short film (Dein na muu) has carried on till its current stage project diary

All links are highlighted

1. Have an Idea

In creating Deinnamuu my main concept was to follow a girl on a journey. The idea started off as a reflection of my current situation of moving to a new location. During the core module presentations, I  explained my previous practice and my intent for this film, the vast majority resonated with the idea of the story anchoring on a journey.

 I was confused about what genre to settle on I started with comedy than tragedy.

core module presentation


2. Develop a storyline/ script.

The storyline came before the name. I aimed at telling a simple story that shows hardship through a journey. The first version of my film was named Maggie in my tea, it was based on a young girl moving into an apartment building in London. Then the location changed to Nigeria so the name reflected that. Dein na muu in my language means safe journey and it is said in burials so it was the perfect word to use to capture the struggle and reflect the culture. I firstly wrote a 20 minutes script, which was unpractical then reduced it to 5 minutes then finally settled on a 2-minute script. 

Script


3. Creating mood boards for characters

I had to organize multiple mood boards because I worried I would create a character style that I can't maintain when in motion.

In the case of creating the main Flora, her mood board started off as a collection of actresses that played a similar role in the past.


4. Creating mood boards for backgrounds

When creating mood boards for my story. The first concern was what location truly fits the story I want to tell. I decided to use my hometown because I have a personal connection there so I'm able to leave easter eggs or just be more confident in drawing out some aspects. 

               Moodboard to influence design                 Mood board to influence colour 


5.  Build a storyboard

While creating Deinnamuu I made several storyboards because the visual outcome I wanted to be kept changing. From the angles to the positioning of the keyframes


         first storyboard                      Final storyboard/colour script


6. Finialise Backgrounds

The design for the backgrounds consisted of a lot of experimentation starting from traditional hand painting to different variations of digital paintings. My intended outcome for the backgrounds was always going to be a watercolour look. However, it was going to be a physical set painted with a mix of water and acrylic, photographed and composed on photoshop and after-effects.


Cardboard composite for scene 1    Watercolour landscape version 2 of scene 1


 Assets to composite on photoshop

The inconsistency of the painting made the renders inconsistent and slightly frustrating.  In digitalising scene 1. I experimented with different concepts, the aim was to retain the paint-like appearance in traditional painting.  After the different test, I decided on the middle one below.


scene 1 remakes    

7. Finialise Characters

In order to finalise designs, I needed a strong grasp of the principles of animating and the general knowledge behind a character's appearance. The key principles that influenced my characters appearance were solid drawings, including secondary motion and appeal. So using line of action I made several sketches of people. I then figured how to locate hidden geometry in people and myself. This helped create beautiful shapes and believable motion.


                                                                      final result


8. Creating concept art

I created a wide range of concept art merging my background and character designs


9. ORGANIZE!

This is really important. honestly, you ideally should organize your time from day 1 of idea building. 
However, I began organizing my time properly when creating the animatic. I used a Gantt chart on a google sheet to do this.


10. Animatic

Creating the animatic really helped me personally see the direction the narrative is going. Here you can finalise camera angles, organize sound and most importantly set fixed timing.

the first animatic made was very loose animatic 1 then refined to a more understandable version with the background animatic 2 then finally created final animatic


The animatic backgrounds are made black and white in order to focus on the intensities and shadows before applying hues.

11. Exporting scenes from animatic

As mentioned before the animatic serves as a guide for timing and placements. It's a rough way to see the final outcome play out. After creating the finished animatic scenes were exported individually from storyboard pro and imported into toon boom harmony.
Here a background is added on top and motion is drawn out.


12. Creating motion 

In animation, motion can be created in many different ways from 2d to stop-motion to 3d. Even in these divisions, there are subdivisions like 2d has frame by frame drawing or rigging and in these subdivisions, animators have their own unique way of going about it. 

The way I went about creating motion was unique to what I was reading, told and experimented.

12 a.  Firstly I would act out the motion, trying to abide to the time I set on the animatic. If there are multiple people in a scene I will act the different parts


     b. Use X-Sheets, I have a previous post talking about how I learnt to use these. It helped me regulate the speed while keeping the nuances in the motion.
     c. Then using the Xsheets and acted out motion. I started creating rough stickmen of the motion based on the geometry present in the characters design


When creating these sketches I made sure the motion was drawn from keyframe to keyframe
then breakdown poses then inbetweens.


d. Final rendering
While rendering i realised I'm running out of time so I began making these quick colour blocks of single colours then turning it into a mask. Then I could loosely paint over and the colour still appears very solid. however, in some cases, the make was reshaped by drawing over in a new layer.


scene 22

Some light motion like the one in scene 5 was still made with keyframes like in the animatic. 


scene 5


Then lastly extras like humans, animals, cars, houses and trees were drawn on separate files and imported into scenes for more context.
13. Final edits.

A good final edit helps elevate the story however a bad edit could deteriorate the film. As recommended for Deinnamuu I used After effects and premiere pro for final compositions and edits. I used this software to regulate colour tones between scenes. Add transitions, reshuffle shots, arrange sounds and, add titles and credits.


14. Export from premier pro

Knowing the general information on how your file is exported helps avoid overly large files with bad quality. Below shows the settings I use for the best results.


  links


Saturday 19 June 2021

final renders 💭

When creating digital art I render each segment of the image in order to be more intentional with toning and creating the shape.

However, my 2-minute film consists of about 7000 frames so that method wouldn't allow me to achieve my style in this short period of time.

Therefore I decided to try a different method by creating a solid silhouette of each movement. Using the cutter too I can loosely paint a neat mask of the right colour over it.

Firstly I had to decide on the appropriate brush and colour to use. That would give the best effect and feel the best.

Brush test; 


I then created a rough planning of the film (video) to test out the chosen rendering style of each scene before application. I decided to abandon the textured brushes and stick to a solid airbrush, this would give the intended style proposed on the module diary.

 In doing this process I even realised areas that could be improved or rearranged in order to tell the story better.


Friday 18 June 2021

Rotoscoping movements


Rotoscoping: An animation technique in which frames or cels are traced from a live-action movie  - encyclopedia


While creating the scenes I initially relied a lot on rotoscoping each movement, this is because I didn't understand how to properly time and space an action.

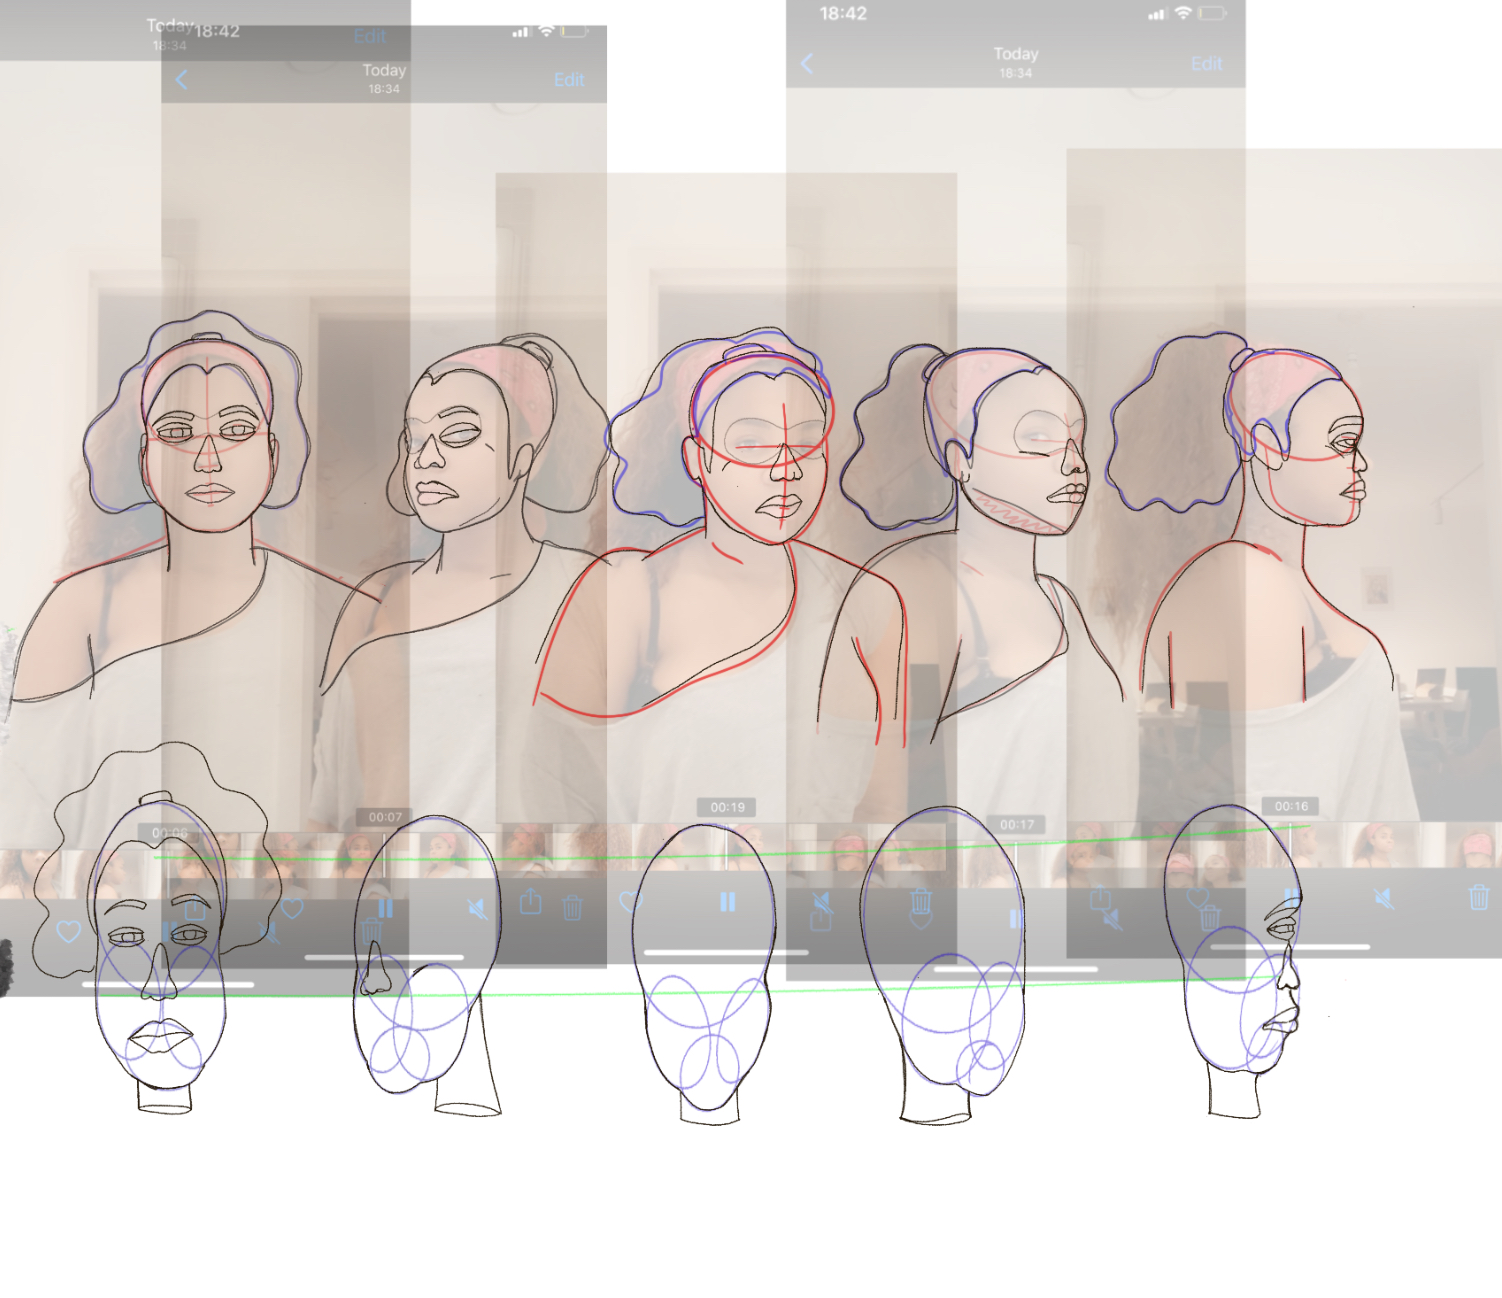
below shows a work in progress clip of scene 9 on the timeline where I rotoscoped the movement from a live-action reference of myself.


This method worked well for the first 3 scenes I created, it didn't only help me create believable motion where we can see Flora raising her head fearfully before she opens her eyes. Rotoscoping helped me study my performance more closely. 

As a beginning animator, this method is very helpful to begin the animating process. especially in this case where I and the character share similar features, I get to even imitate more nuances in the face.


Issues:

I noticed rotoscoping didn't really provide room for more obscure movement and the method also seemed to be very time-taking.


creating busy backgrounds for scene 1 shot 1

 Scene 1

The vision of scene 1 was rather difficult to achieve because it was harder to act out every action needed. Therefore I decided to try out creative ways to solve this difficulty

I initially adopted this method of smuggling silhouettes of a busy crowd as done on paintings by LS Lowry

                 L.S. Lowry: 'I'm Fed Up With Painting' - ArtReview

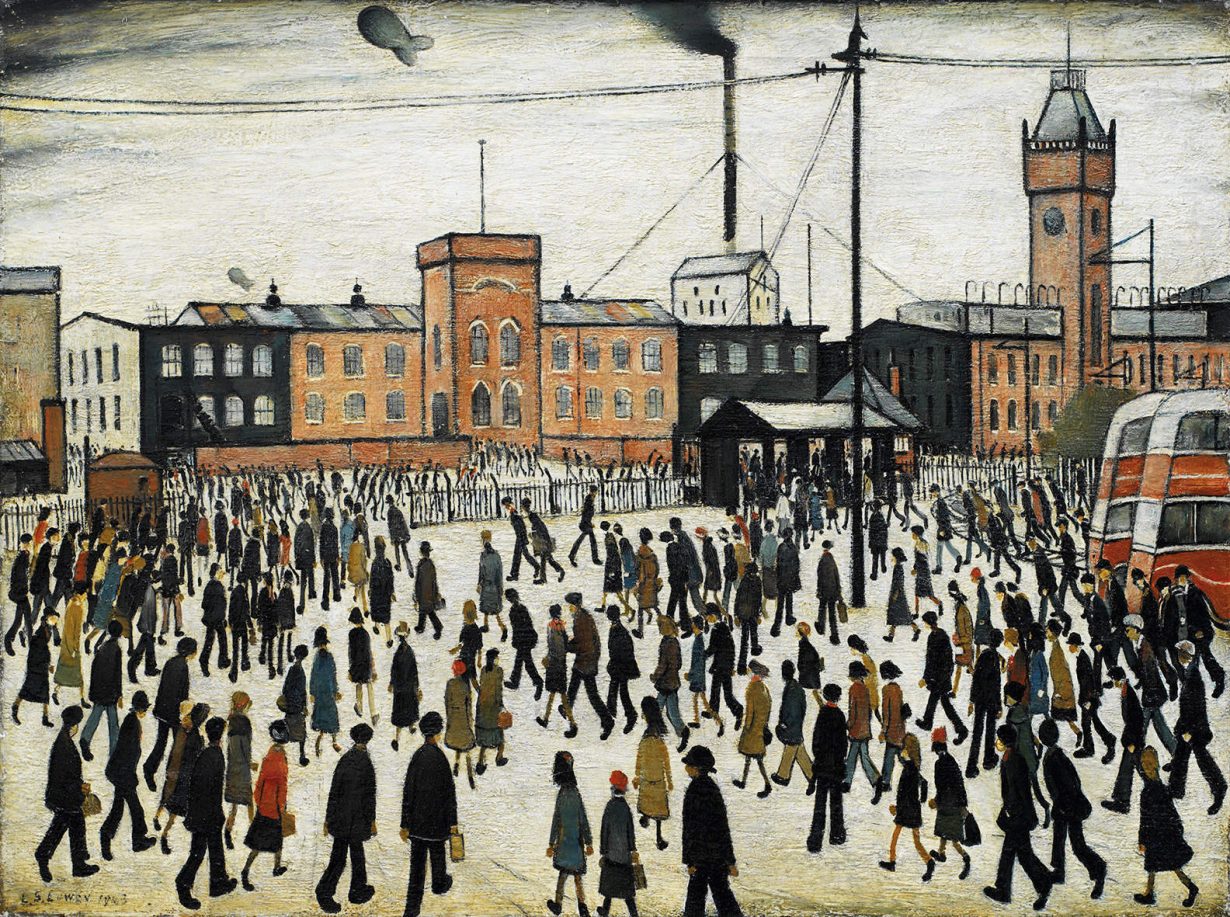
To achieve this painterly feeling I decided to use photoshop.


I ended up abandoning the lowry method. it was difficult for me to replicate the personality of the place with that method.

So I left the smudges but I created defined character extras and props. 


After creating about 30 drawings of people and animals I used them to populate the scene.


Thursday 3 June 2021

creating the ending Scenes 💬

 This might be my proudest scene so far...

what worked:

As my skills have been evolving I have noticeably been relying less on my references.

so this sequence below is the ending scenes when Flora returns home to a warm embrace by her mother.


VIDEO ðŸ’¬


The rough sketch movement only consists of keyframes and few breakdowns to scale the feeling.

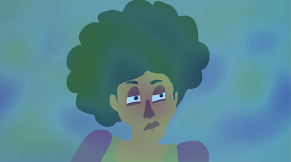
I believe the movement is having more of a cartoony feel to the character. I am most pleased about the stretch I was able to add when the mother moves back to give more emphasis as explained in the illusion of life. This was a problem when rotoscoping because I was guided by realistic actions.


The reason I refer to this as my proudest scene so far is because of creating the ending hug scene. currently, it is still in sketch form but I can already see the personality of a tired young girl and an excited mother. 


What didn't work: 

Its hard to know yet because there is still much refining needed but the main purpose of the sketch movement was to create believable motion so I believe the purpose has been served.


What learning came out of this:

There is less pressure and faster work when the is a prime focus on the action.

How I will apply what I've learnt in the next step:

while creating the characters I focused on one colour section of the character and used colour to separate each. In the next stage, I would focus on one colour group at a time mainly for consistency but also concentrate on the movement and how to make it better.

Time passing

The film spans over a period of about a year, however seeing that its only a 2 minute film I struggled with making the time passing. My firs...